Table of Contents
Prepping Your RV Solar Batteries for the Cold
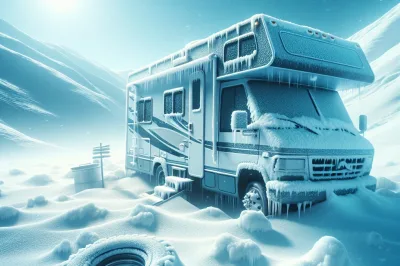
When the leaves start to turn and the air gets crisp, it’s not just your wardrobe that needs a change. Your RV solar batteries need a cozy setup to handle the winter chill too. Like bears hibernating, your batteries need to be prepped for a long, cold slumber to wake up fresh in the spring. So, let’s get your RV’s power source tucked in and ready for the frosty months ahead.
Key Takeaways: Quick Tips to Protect Your Power
- Keep your batteries fully charged before they go into hibernation mode.
- Insulate your batteries to protect them from the cold – they need a warm blanket too!
- Consider a trickle charger to maintain battery charge without overdoing it.
- Choose the right storage location to shield your batteries from harsh winter conditions.
- Regular health checks are like giving your batteries a cozy cup of hot chocolate.
The Right Charge to Beat the Freeze
Imagine going out in the snow without your gloves – pretty uncomfortable, right? The same goes for your RV batteries. They need to be ‘dressed’ properly with a full charge to combat the cold. A fully charged battery is less likely to freeze than one that’s depleted, and here’s how to make sure your batteries are ready for the big chill.
Understanding Battery Charge Levels
First things first, we need to talk about charge levels. Think of your battery like a gas tank – when it’s full, it runs at its best. But when it’s empty, it’s more vulnerable to damage, especially in the cold. Here’s the deal:
- A fully charged battery has a lower freezing point, making it more resilient in winter.
- Discharged batteries can freeze at much warmer temperatures, leading to possible damage.
- Keeping your battery charged ensures the chemical reactions inside stay active, even when it’s cold out.
Steps to Ensure Full Charge Before Storage
Now, let’s make sure your batteries are as snug as a bug in a rug. Before you store your RV, give your batteries a good, full charge. Use a reliable charger and let it do its thing – don’t rush this process. Once charged, disconnect the batteries to prevent any parasitic drain. You know, those little energy suckers like clocks and alarms that can slowly drain your battery without you even realizing it.
- Use a multistage charger to bring your batteries to full charge without overcharging.
- After charging, disconnect the batteries to prevent energy leaks.
- Check the battery voltage periodically to ensure it stays topped up.
Insulation: Your Battery’s Winter Jacket
Just as you wouldn’t step out into the snow without your coat, your batteries need insulation to fend off the cold. Insulation helps maintain the battery’s internal temperature, reducing the risk of freezing and keeping the chemical reactions inside humming along. Let’s wrap up your batteries so they stay toasty all winter long.
- Insulate your batteries with covers or blankets specifically designed for this purpose.
- Place the batteries on a non-conductive surface to prevent heat loss to the ground.
- Make sure the insulation is secure but not too tight – batteries need to ‘breathe’ to prevent condensation.
Remember, taking care of your RV solar batteries during the winter isn’t just about longevity; it’s about being ready for adventure at a moment’s notice. With these tips, you’ll ensure your batteries are as eager for spring as you are.
Materials You’ll Need for Insulation
Alright, let’s gear up! Insulating your batteries is like packing for a winter trip – you need the right stuff. You’ll want materials that trap heat without causing moisture issues. Here’s your shopping list:
- Insulation blankets or battery pads designed for the job.
- Non-conductive foam board for added insulation under and around the batteries.
- Reflective foil tape to secure the insulation and reflect cold away.
- A weather-resistant container if you’re storing the batteries outside of the RV.
- Some zip ties or straps to keep everything snug and in place.
- Remember, the goal is to keep the cold out and the warmth in, so choose materials that are up to the task.
DIY Insulating Techniques
Now, let’s put those materials to work. Insulating your batteries is a hands-on project, but it’s nothing you can’t handle. Wrap the insulation blankets or pads around each battery, making sure they’re covered on all sides. Use the reflective foil tape to seal the edges and keep everything tight. If you’re using foam board, cut it to size and place it underneath and around the batteries, then secure it with zip ties. It’s a bit like wrapping a present – one that gives you the gift of power all winter long.
Disconnect Vs. Trickle Charge
Here’s the big question: to disconnect or not to disconnect? Disconnecting your batteries can prevent any unwanted drain, but a trickle charger keeps them topped up without overcharging. It’s a bit like choosing between a long winter nap or a light snooze. Let’s figure out which one suits your setup best.
When to Disconnect Your Batteries
If your RV is going to be sitting still for the winter, and you’re not planning to use any of its systems, it might be best to disconnect. This way, you’re taking the batteries completely out of the equation, and they can’t be drained by any sneaky energy thieves. Just make sure you’ve charged them up fully first – you don’t want them getting cold feet, literally.
How to Apply a Trickle Charge Correctly
If you decide to keep your batteries connected, a trickle charger is your best friend. It’s like a slow, steady drip of energy that keeps your batteries happy without overwhelming them. Connect the charger to your batteries and set it to the appropriate voltage. It will do its thing, keeping the charge just right, like the porridge in Goldilocks – not too hot, not too cold.
Shelter from the Storm: Physical Protection Strategies
Even with insulation, your batteries need a safe spot to ride out the winter. Think of it as finding the perfect cave for a bear’s hibernation. You want a place that’s dry, sheltered from the wind, and ideally, not too extreme in temperature. If you’re storing the batteries outside of your RV, a sturdy, weather-resistant container is key. It’s like building a fort – you want it strong and secure. And if you can, store the batteries off the ground to keep them away from moisture and frost. With the right shelter, your batteries will be snug as a bug in a rug until it’s time to hit the road again.
Choosing the Right Storage Location
Location, location, location – it’s not just important in real estate. Where you store your batteries can make all the difference. The ideal spot is cool, but not cold, and dry as a bone. Think of a place like your basement or a temperature-controlled garage. Avoid areas where temperatures drop below freezing or where moisture can sneak in and cause corrosion. If you’re storing the batteries inside your RV, make sure the area is well-ventilated to prevent any gas buildup from the batteries.
Using Battery Warmers and Heating Pads
When the mercury dips, battery warmers and heating pads can be lifesavers. They’re like electric blankets for your batteries, gently warming them to keep that charge steady. Just wrap them around your batteries and plug them in. They’ll maintain a consistent temperature, which is especially handy if your storage location isn’t the warmest. Just be sure to monitor them – you want warm, not hot, batteries. It’s all about that cozy middle ground.
Maintenance Chargers and Smart Choices
Keeping your batteries charged without overdoing it is a delicate dance. That’s where maintenance chargers come in. They’re the wise old sages of the charging world, knowing just how much power to give and when to stop. They’ll keep your batteries at the perfect level of charge, ready to spring into action when you are. So, let’s dive into how to pick the right one and use it wisely.
Selecting the Best Maintenance Charger
Choosing a maintenance charger is like picking a good babysitter for your batteries. You want one that’s reliable and has a good reputation. Look for a charger with a float mode, which allows it to maintain the battery’s charge without overcharging. Make sure it’s compatible with your battery type, whether it’s lead-acid, AGM, or lithium. And always go for quality over price – this is one area where you don’t want to skimp.
Smart Charging Practices
Smart charging isn’t just about the equipment; it’s also about how you use it. Always follow the manufacturer’s instructions to a T. Don’t leave the charger on all winter without checking in – that’s like leaving a pot on the stove unattended. Periodically check the battery voltage and the charger’s status to ensure everything is working as it should. And remember, a maintenance charger is for maintaining, not reviving, so make sure your batteries are fully charged before hooking them up.
Battery Health Checks and Balancing Acts
Regular health checks are the secret to a long and happy life – for you and your batteries. Every so often, give your batteries a check-up. Look for signs of wear and tear, clean any corrosion, and make sure the connections are tight and secure. It’s also a good time to balance your batteries if you’re using more than one in a system. This means making sure they’re all at the same charge level, so they play nice together and one doesn’t drain the others.
Maintaining Fluid Levels
Just like you wouldn’t run a marathon without a water bottle, your batteries shouldn’t go through winter without the right fluid levels. For those with lead-acid batteries, it’s crucial to check the electrolyte levels. Low levels can lead to sulfation and battery damage, especially in cold weather. So, pop those caps, take a peek inside, and if needed, top them up with distilled water. Just be careful not to overfill – you’re aiming for a full tank, not a flood.
Performing Regular Health Checks
Think of health checks as your batteries’ annual physical – they’re essential for catching issues early. Every month or so, take a look at your batteries. Check for any swelling, which can be a sign of overcharging or freezing. Tighten up loose connections, and clean off any corrosion with a mix of baking soda and water. It’s like giving your batteries a spa day; they’ll come out feeling refreshed and ready to perform.
Troubleshooting Common Winter Battery Issues
Even with the best care, sometimes batteries act up in the cold. But don’t worry, it’s usually something you can fix. Let’s go through some common winter woes and how to set them right.
Addressing Voltage Drops
If you notice your battery voltage is lower than it should be, it’s like finding your car’s tire is a little flat. It’s not the end of the world, but it needs attention. First, check the connections – are they tight and corrosion-free? Then, give your batteries a good charge. If they’re still not holding a charge, it might be time to consult a professional. It’s like asking a doctor for a second opinion – sometimes you need an expert’s help.
Handling Start-up Problems After Storage
So, you’ve pulled your RV out of hibernation, but it’s not waking up as it should. Before you panic, check the basics. Are the batteries charged? Are the connections clean and tight? Sometimes, all it takes is a little jiggle of the cables or a fresh charge to get things moving. If that doesn’t do the trick, your batteries might have lost their oomph over the winter, and it could be time for a replacement. Think of it as retiring an old racehorse – it’s had a good run, and now it’s time for a new champion.
FAQ: Keeping Your RV Batteries Alive & Kicking Through Winter
You’ve got questions, we’ve got answers. Here are some quick-fire responses to the most common queries about winterizing RV solar batteries.
Can RV solar batteries be left in the cold all winter?
Yes, but they need a little love. Keep them charged, insulated, and in a place that’s not too extreme. It’s like bundling up in layers – it can be done, as long as you’re prepared.
Is it necessary to fully charge RV batteries before winterizing?
Absolutely. A full charge is like a full belly – it keeps your batteries happy and healthy during their winter nap.
How often should I check on my stored RV batteries?
Give them a check-up once a month. It’s like visiting a friend – it’s good to pop in and make sure everything’s okay.
What are the risks of not properly winterizing RV solar batteries?
Not winterizing can lead to damage from freezing, sulfation, and a shortened lifespan. It’s like going out in a blizzard without a coat – not a good idea.
Can I use my RV’s solar panels to charge the batteries in winter?
Yes, if you get enough sunlight. Solar panels can be a great way to keep your batteries topped up, just like a warm cup of cocoa on a sunny winter day.
Can RV solar batteries be left in the cold all winter?
Leaving your RV solar batteries in the cold all winter is like leaving a polar bear in the desert – it’s not their natural habitat. While they can survive, they need the right conditions. Batteries should be kept charged and insulated to prevent the cold from sapping their strength. If you can provide a bit of TLC, your batteries can weather the winter just fine.
Is it necessary to fully charge RV batteries before winterizing?
Charging your RV batteries fully before tucking them in for winter is as necessary as wearing a seatbelt – it’s a safety thing. A full charge helps prevent the battery’s water content from freezing, which can cause damage. Think of it as filling up your tank before a long road trip; it’s just the smart thing to do.
In conclusion, taking care of your RV solar batteries in the winter is all about the details. Keep them charged, keep them warm, and give them a check-up now and then. With these pro tips, you’ll keep the heart of your RV beating strong, no matter how low the mercury drops. So go ahead, embrace the winter with confidence, knowing that your RV will be ready to roll when the flowers start blooming.

His skill in presenting complex technical information in an accessible and engaging manner helps our readers better understand and navigate their solar power journey.